Category: Blogs

Thoughts and recent events.

  • A Humble Hotel Bike in Belize

    A Humble Hotel Bike in Belize

    When the resort we were staying at in Belize mentioned that they had bikes guest could use, I didn’t have high expectations. And yet, I had previously managed to get in some enjoyable rides in Florida on a beach cruiser and again on a town bike in Mexico.   So, when I saw the bikes on offer, I looked past their rusty chains and fixed gears and wondered how far I could ride one in the local area?  A hundred metre test ride told me all I needed to know. The cranks were straight, the chains drove smoothly and the tires were sufficiently inflated to allow me to ride at the same sort of speed I was riding on a studded tires through a Calgary winter.  

    My rusted fixed gear bike with coaster brake

    A quick scan of the local Ride with GPS routes showed me the available rides were limited because the village at Hopkins had only 8km of coastal road and only one paved road heading inland. This road leads you back to the main north-south highway in Belize although that was a simple two-lane road. However, there was another unpaved dirt road that ran parallel to the Sittee River at the south end of Hopkins.  This road was paved for the last few kilometres to the same north-south highway. 

    Sittee River Road – a dirt road out of Hopkins

    Initially, I decided to explore the extremities of the village on the paved coast road. The southern section was characterized by large plots of land occupied by three-storey homes built by expats and foreign tourists.   Theoretically, the narrow strip of beach along the shoreline was public, but there was nowhere to access it and I found my way to the Sittee River was barred by the gates of a private marina.  

    Bicycles similar to the one I was riding were  a popular means of transport for the locals even though cars and pickups were driven by more the more prosperous and foreigners. Gasoline-powered golf carts appeared to be the transport of choice for short term visitors.   Traffic moved slowly along the coast road, in part because tourists and dogs meandered out into the street unpredictably, but also because Belize has a love of sleeping policemen traffic calming bumps.  Some of these bumps are so vicious that cars have to traverse them at sub-walking speed. 

    Trails in Bocawina National Park

    Exploring in the other direction, I rode past the hotel district  where building heights are again limited to three storeys and into the village which is where the local Belizeans live.   By this stage I had ridden the bike about 5km and understood its idiosyncrasies.  The main problem was I couldn’t even adjust the saddle height as the stem was rusted in so when I slackened the pinch nut and pulled, the saddle came off in my hands.  This meant my knees were rising too high and taking more strain than normal.  Also, the saddle itself was of the wide, cushiony type, favoured by non-cyclists  but not suitable for riding any distance.  

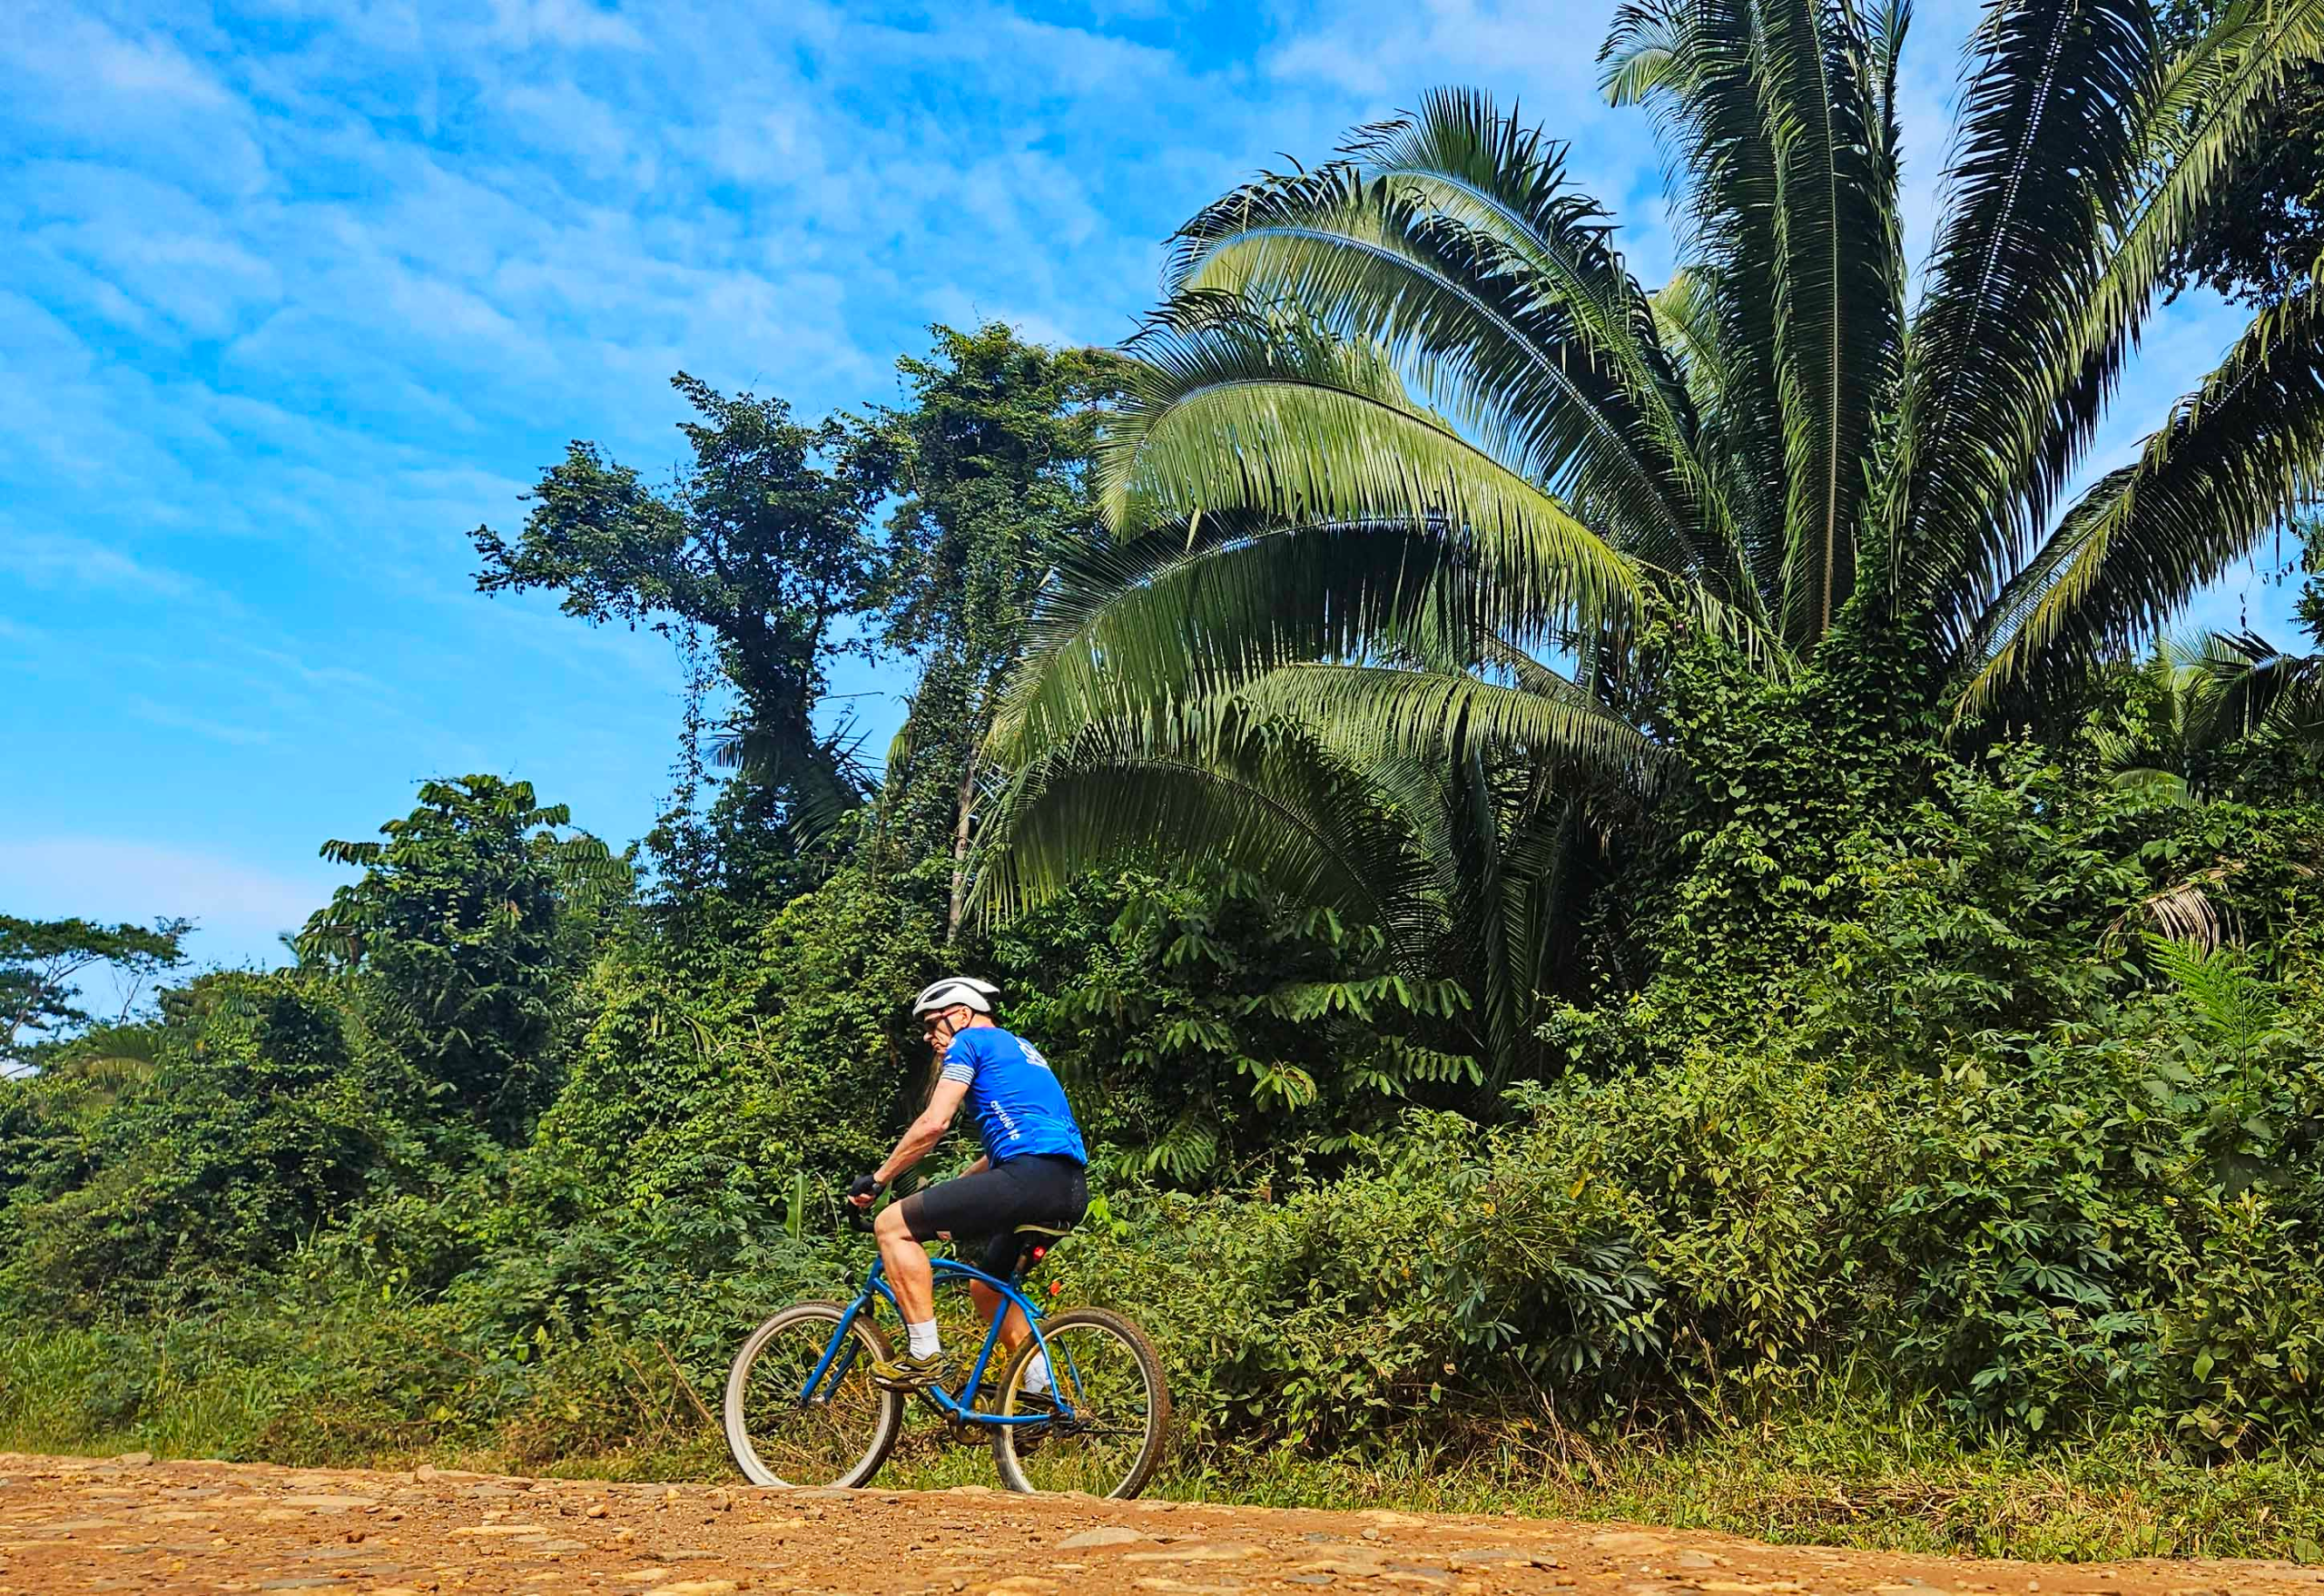
    I was going to limit this first ride to an hour or ninety minutes but I still wanted to explore the dirt roads so headed inland on the Sittee River Road.   The dirt was rutted and potholed but the wide tires (50mm) coped well and there were usually smoother lines to follow.   I wasn’t aware of insects at the time but later found I had received a few mosquito bites.  I was aware of the temperature and high humidity though and was wearing shorts and a short-sleeved jersey but still sweating profusely. 

    The bike had no bottle cage so I was resorting to the traditional method of caring a bottle in my rear centre pocket.  I mused that multi-tool I was also carrying  wouldn’t fit any of the bolts on the bike and I had no puncture repair kit either.   Consequently, once I moved north  out of the village I made sure I had a cell phone signal and the hotel number.  They had several minibuses and I’m sure would have come out and recovered me if necessary.

    In Sittee Village I had two options. I could either continue to the main highway, ride north on the highway until I reached the paved road back to Hopkins,  or I could take a farm track that ran parallel to the main highway until I intersected the paved Hopkins Road.  Opting for the latter, I soon found myself on a partly overgrown double track between plantations of coconuts and bananas.   Green bushes were decorated with bright yellow and red flowers and others I recognized as purple morning glory.   I splashed through muddy troughs but the dirt dried quickly on my shorts and bushed off.

    An abandoned shack – off route in a coconut plantation

    Luckily, the tires were soft enough and wide enough to cope with the terrain  even if keeping the pedals turning was tough on my knees.   After one false turn where I ended up at a ramshackle hut guarded by a dog, I managed to thread my way back towards the paved road.  The return to Hopkins was easy from there but, heading back, I made a mental note to find a bike with an adjustable saddle for my next outing.

    By securing a bike before 8am, I found I had a better selection but they were all the same type just in in a range of sizes.  Fortunately, I discovered one that still had an adjustable saddle stem with a quick release so I could fine-tune the height while I was out.  The tires were softer than I would have like so I attempted to inflate them with the small hand pump I had brought with me. I guess I managed to pump them to around 30psi  before I ran out of enthusiasm.   

    The other items I had brought with me were a high intensity rear light and a Garmin mount for my cycle computer.   Bike lights were a complete novelty in Belize as I never saw a single bike using lights day or night.  Kids would ride past you in complete darkness in the village of Hopkins, navigating by moonlight. The resort locked its bikes up at sunset to prevent guests being tempted to venture out in the dark. 

    No-one has lights on their bikes either in the dark or during the day

    I was happy to retrace  the dirt route to Sittee River on my next trip but then I continued to the main highway.   Named the Thomas Vincent Ramos Highway  after a local civil rights activist, the road was much quieter than I had expected with only one or two vehicles a minute passing me. Moreover,  the road surface where I entered the highway was smooth asphalt,  in far better condition than the highways around Calgary.    As I headed south,   I did come across one patch of road where the tar had been stripped back revealing a chalky stone base layer but this was easy to cycle around. I had no idea when it would eventually get resurfaced as it was still in the same state when we drove past several days later.  Further on, the smooth asphalt transitioned to a chip seal surface with signs cautioning “Drive Slowly”, even though the chips were well bedded so there was no reduction in my speed. 

    The main north-south Ramos Highway – smooth pavement with the odd bare patch

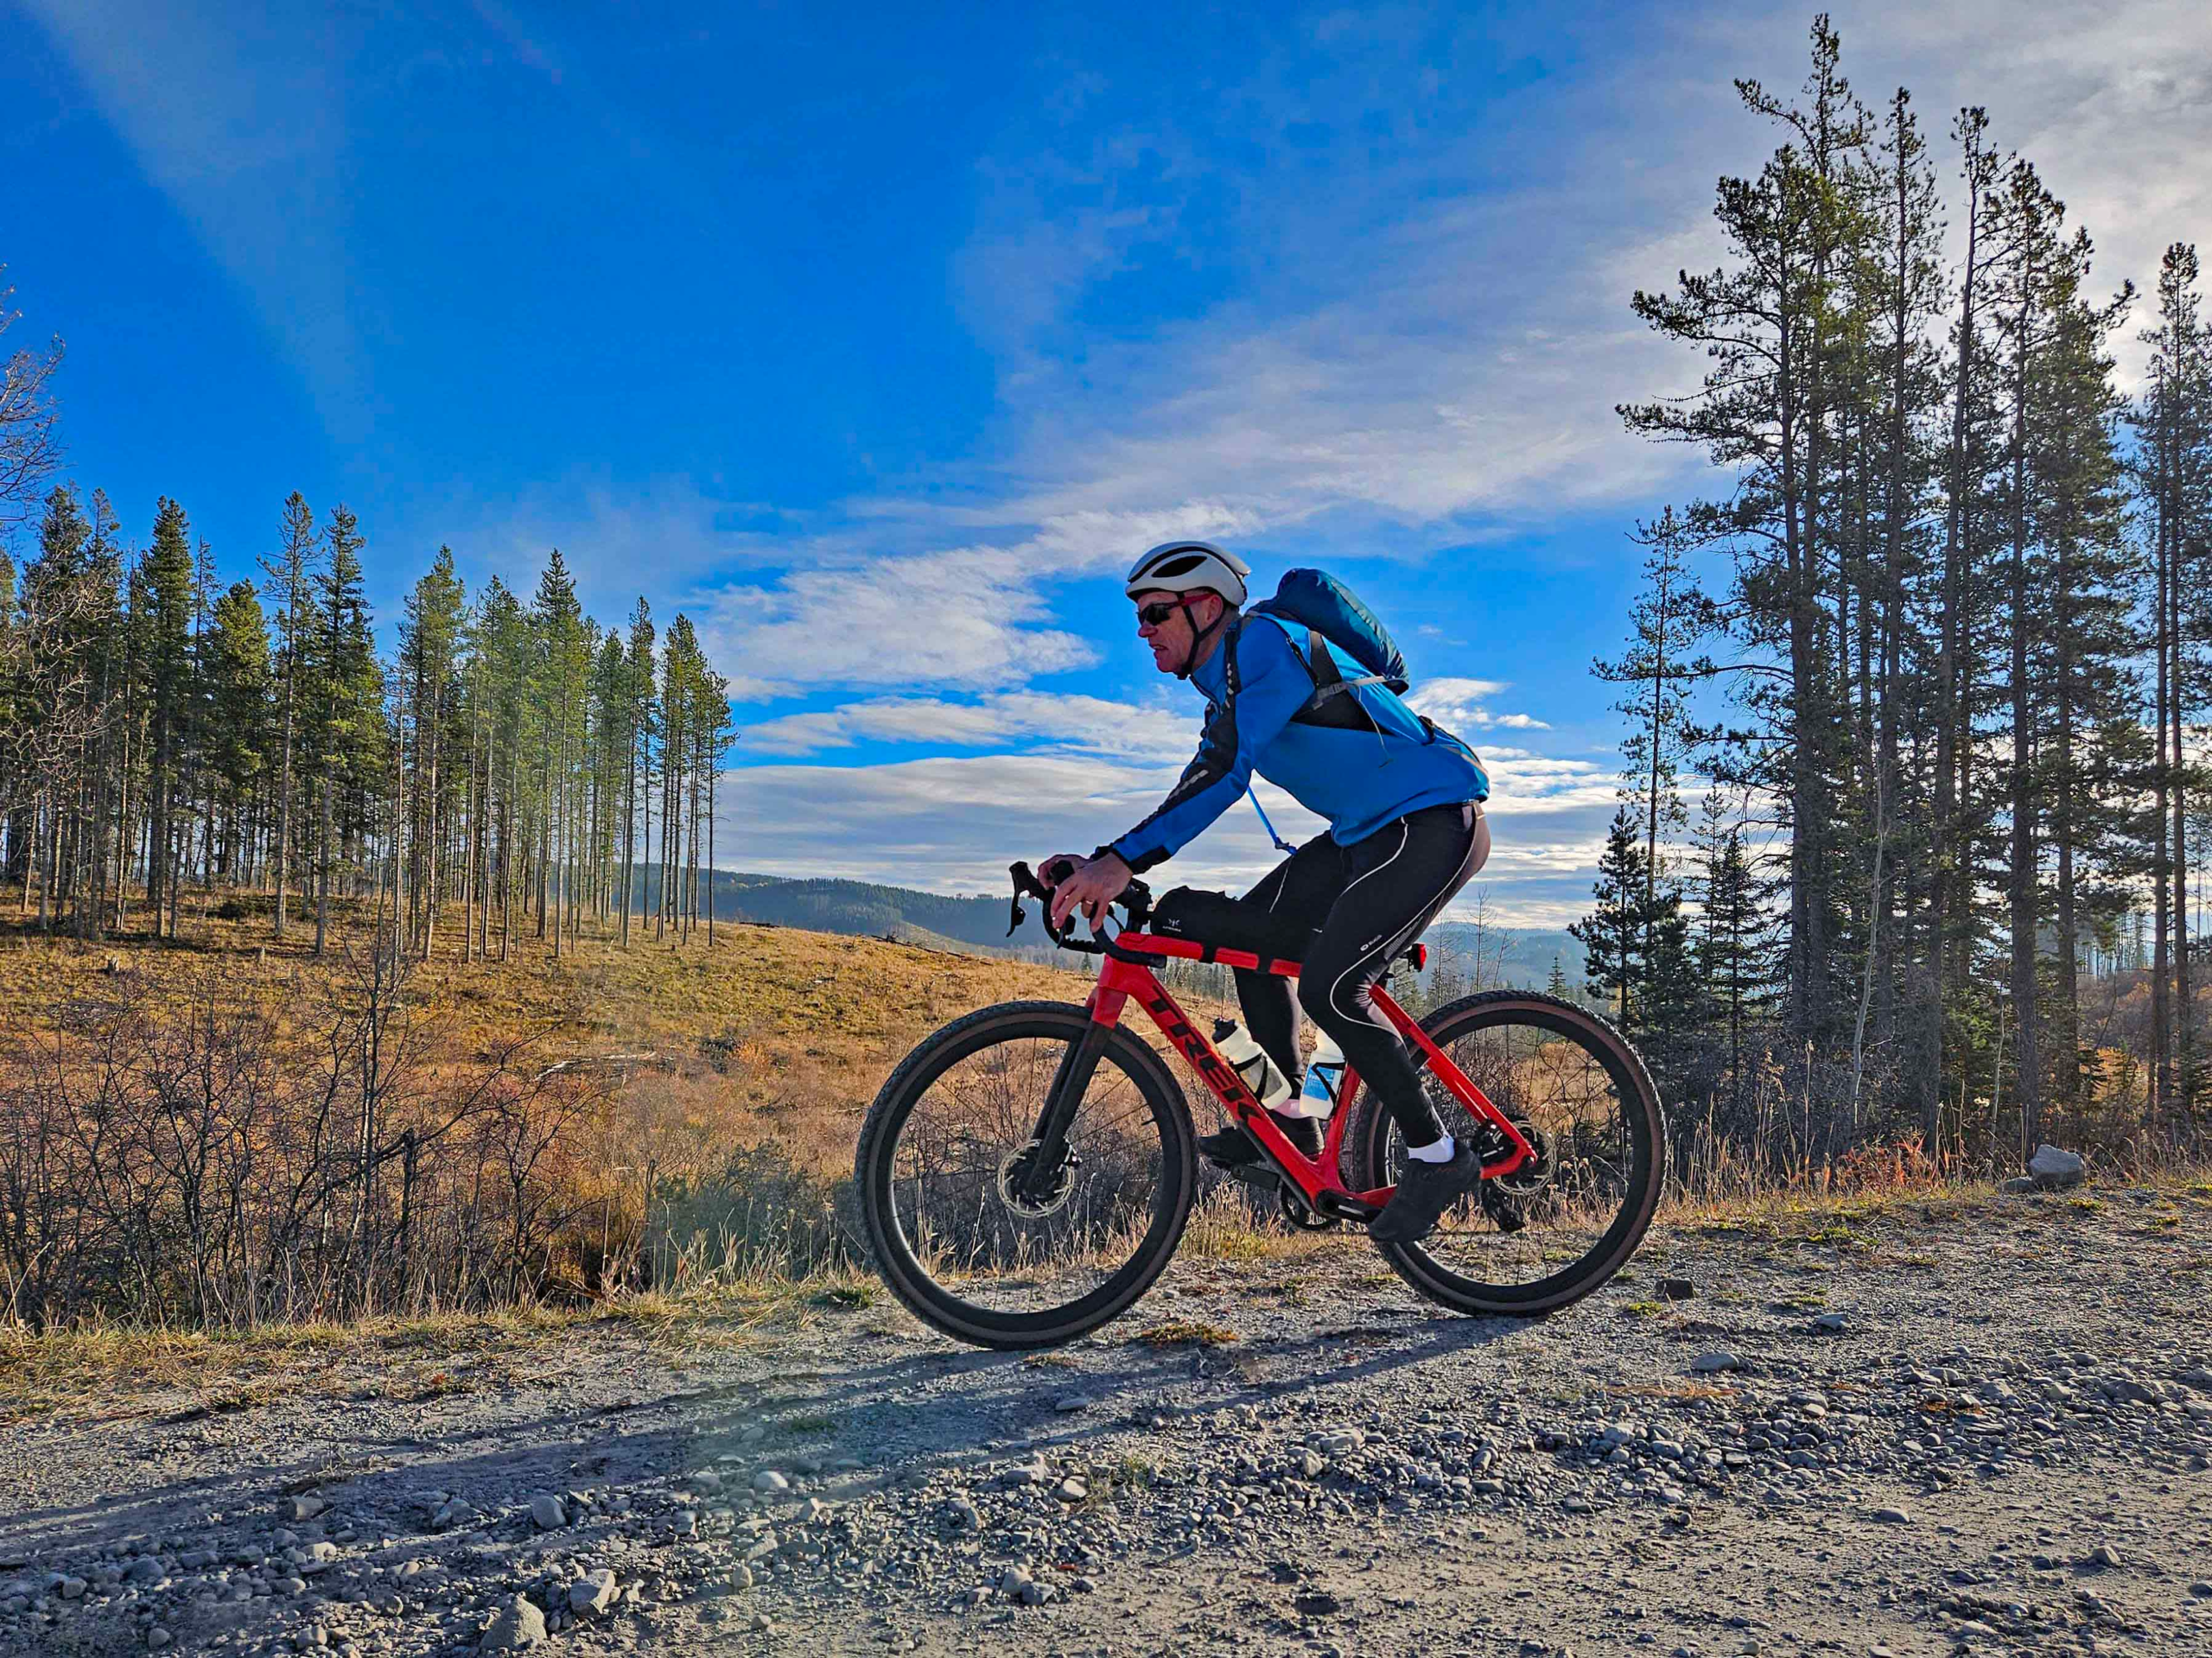
    As I crossed the Sittee River, the road dipped slightly to the bridge and the gradient up afterwards gave a hint of the bike’s climbing limitations.  My chain ring had 40 teeth while the rear sprocket had just 14, giving a relatively high gear ratio of 2.86 equivalent to the 9th gear of my 12-gear Trek Checkpoint gravel bike.  On the smooth flat roads of the coastal plain, this wasn’t an issue. However, my destination was a pass between the hills on the road to the Cockscomb Basin nature reserve.

    I turned west onto a dirt road and once I had passed some houses I was riding through tropical forest.   The road undulated to cross two creeks but then started to climb in earnest at a modest 5% but this gradient was quickly too much for me on that bike.  Even standing on the pedals and hauling on the handle bars I couldn’t keep the pedals turning. It didn’t help that the grips on the cruiser style bars were loose and tried to slide off so I had to hold the chromed metal below them.   

    Once the gradient increased it was impossible to keep the pedals turning

    At least my descent back to the main highway was fast, though this time the gear span- out as the ratio wasn’t high enough.   My fastest speed was around 35kph downhill while on the flat I had managed around 20kph in still air.   Returning to Hopkins, I choose paved roads and  faced a stiff sea breeze headwind.  The high cruiser style handlebars threw your body up into the wind so the only cure was to hold the handlebars much lower down to reduce drag.  

    Knowing the limits of the bikes available, I planned my last ride with an easier, secondary, objective that I could ride if I got behind schedule or if the grades were too steep.  In the end, it was the strong north wind that forced my hand as I could only manage 17kph when I left Hopkins to ride north up the Ramos Highway.  My intended destination this time was an abandoned jail near Alta Vista on the Hummingbird Highway but this would entail my riding on dirt roads over a low hill.

    At the turnoff for the dirt raid I was already behind schedule and the gentle climb on this road reduced my speed further to around 16kph.  Unlike the motor vehicles which plied this road on their way towards the Bocawina National Park, I could ride around the ruts and potholes. Some 5km from the highway, I reached the turnoff where my route climbed to the north.  Halfheartedly, I started to investigate this road and crossed over Silk Grass Creek on an old bridge.

    Beyond the bridge, the route climbed into an old plantation but it wasn’t clear whether road access was private or public.  Threatening signs warned against trespassing. By that stage I had already  decided to ride to my secondary destination, the Bocawina National Park so I backtracked to the junction and continued heading west.  Nowhere was the gradient steep but the road climbed gradually to the park entrance.  

    Old bridge over Silk Grass Creek

    Returning back down the dirt road, I benefitted from the gentle gradient and managed to maintain 20kph.  Then, with the wind at my back,  I maintained 22-24kph on the paved road but I still faced a headwind component on the final run into Hopkins.

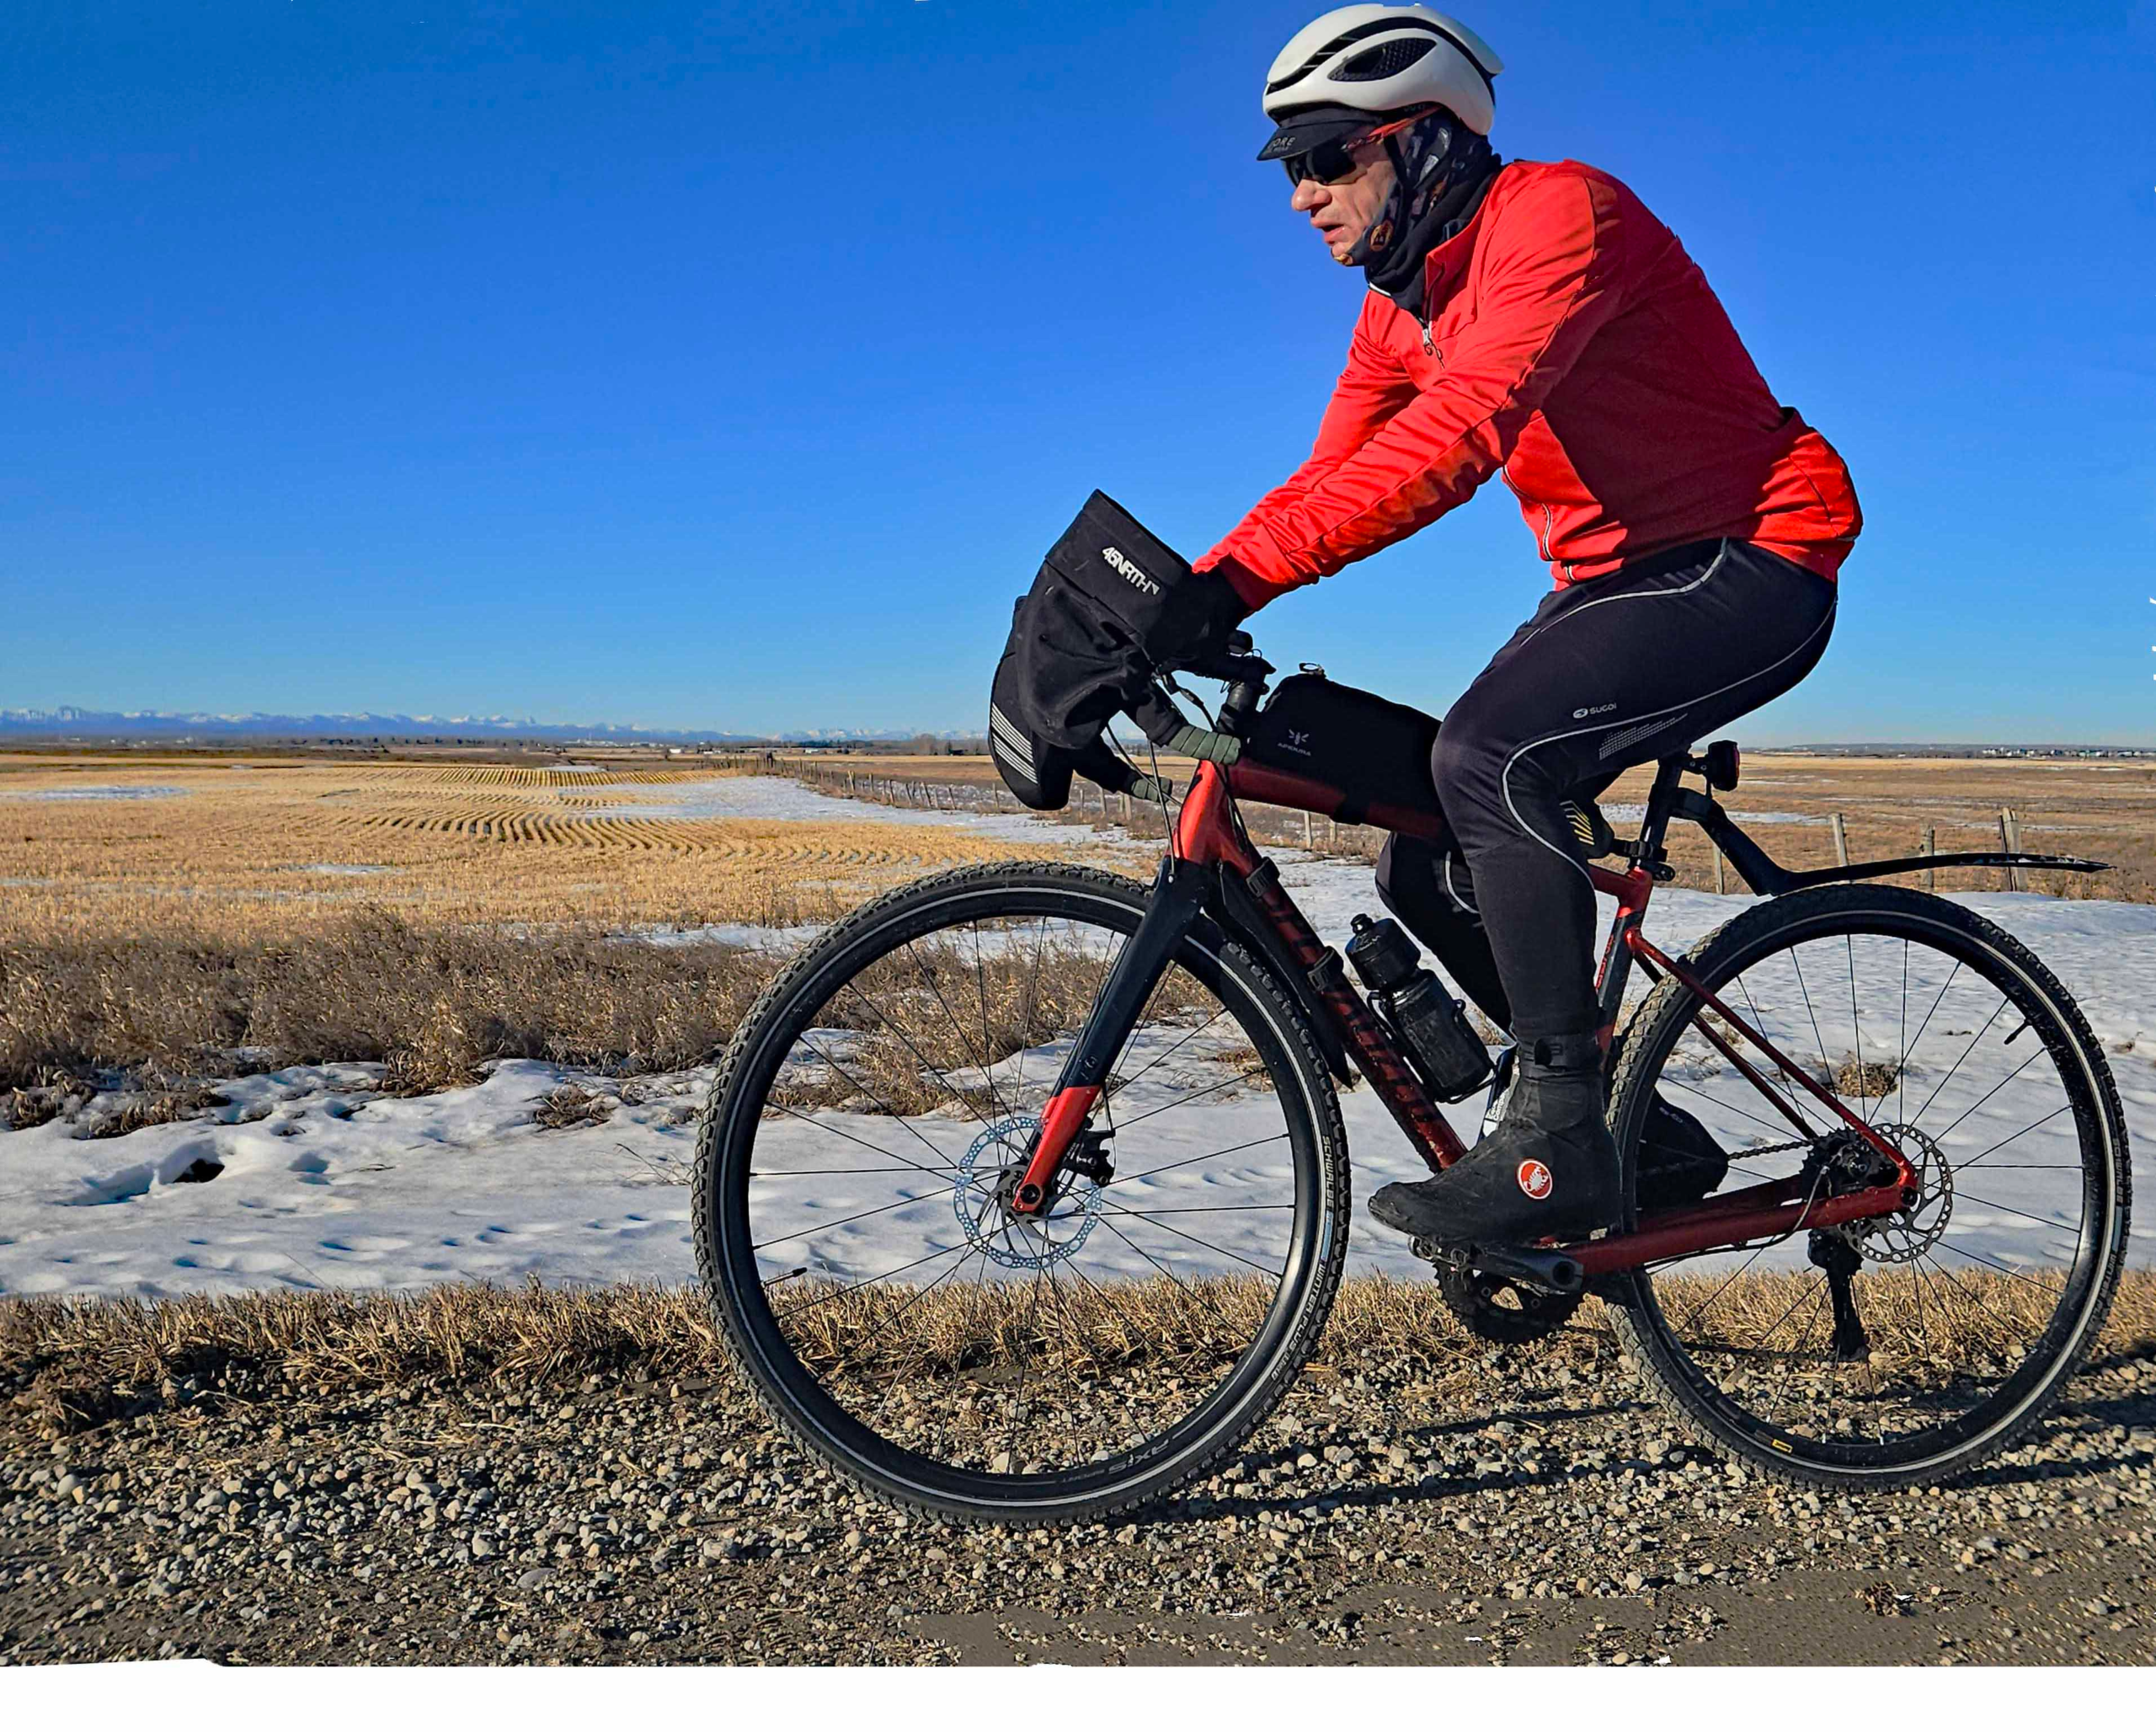
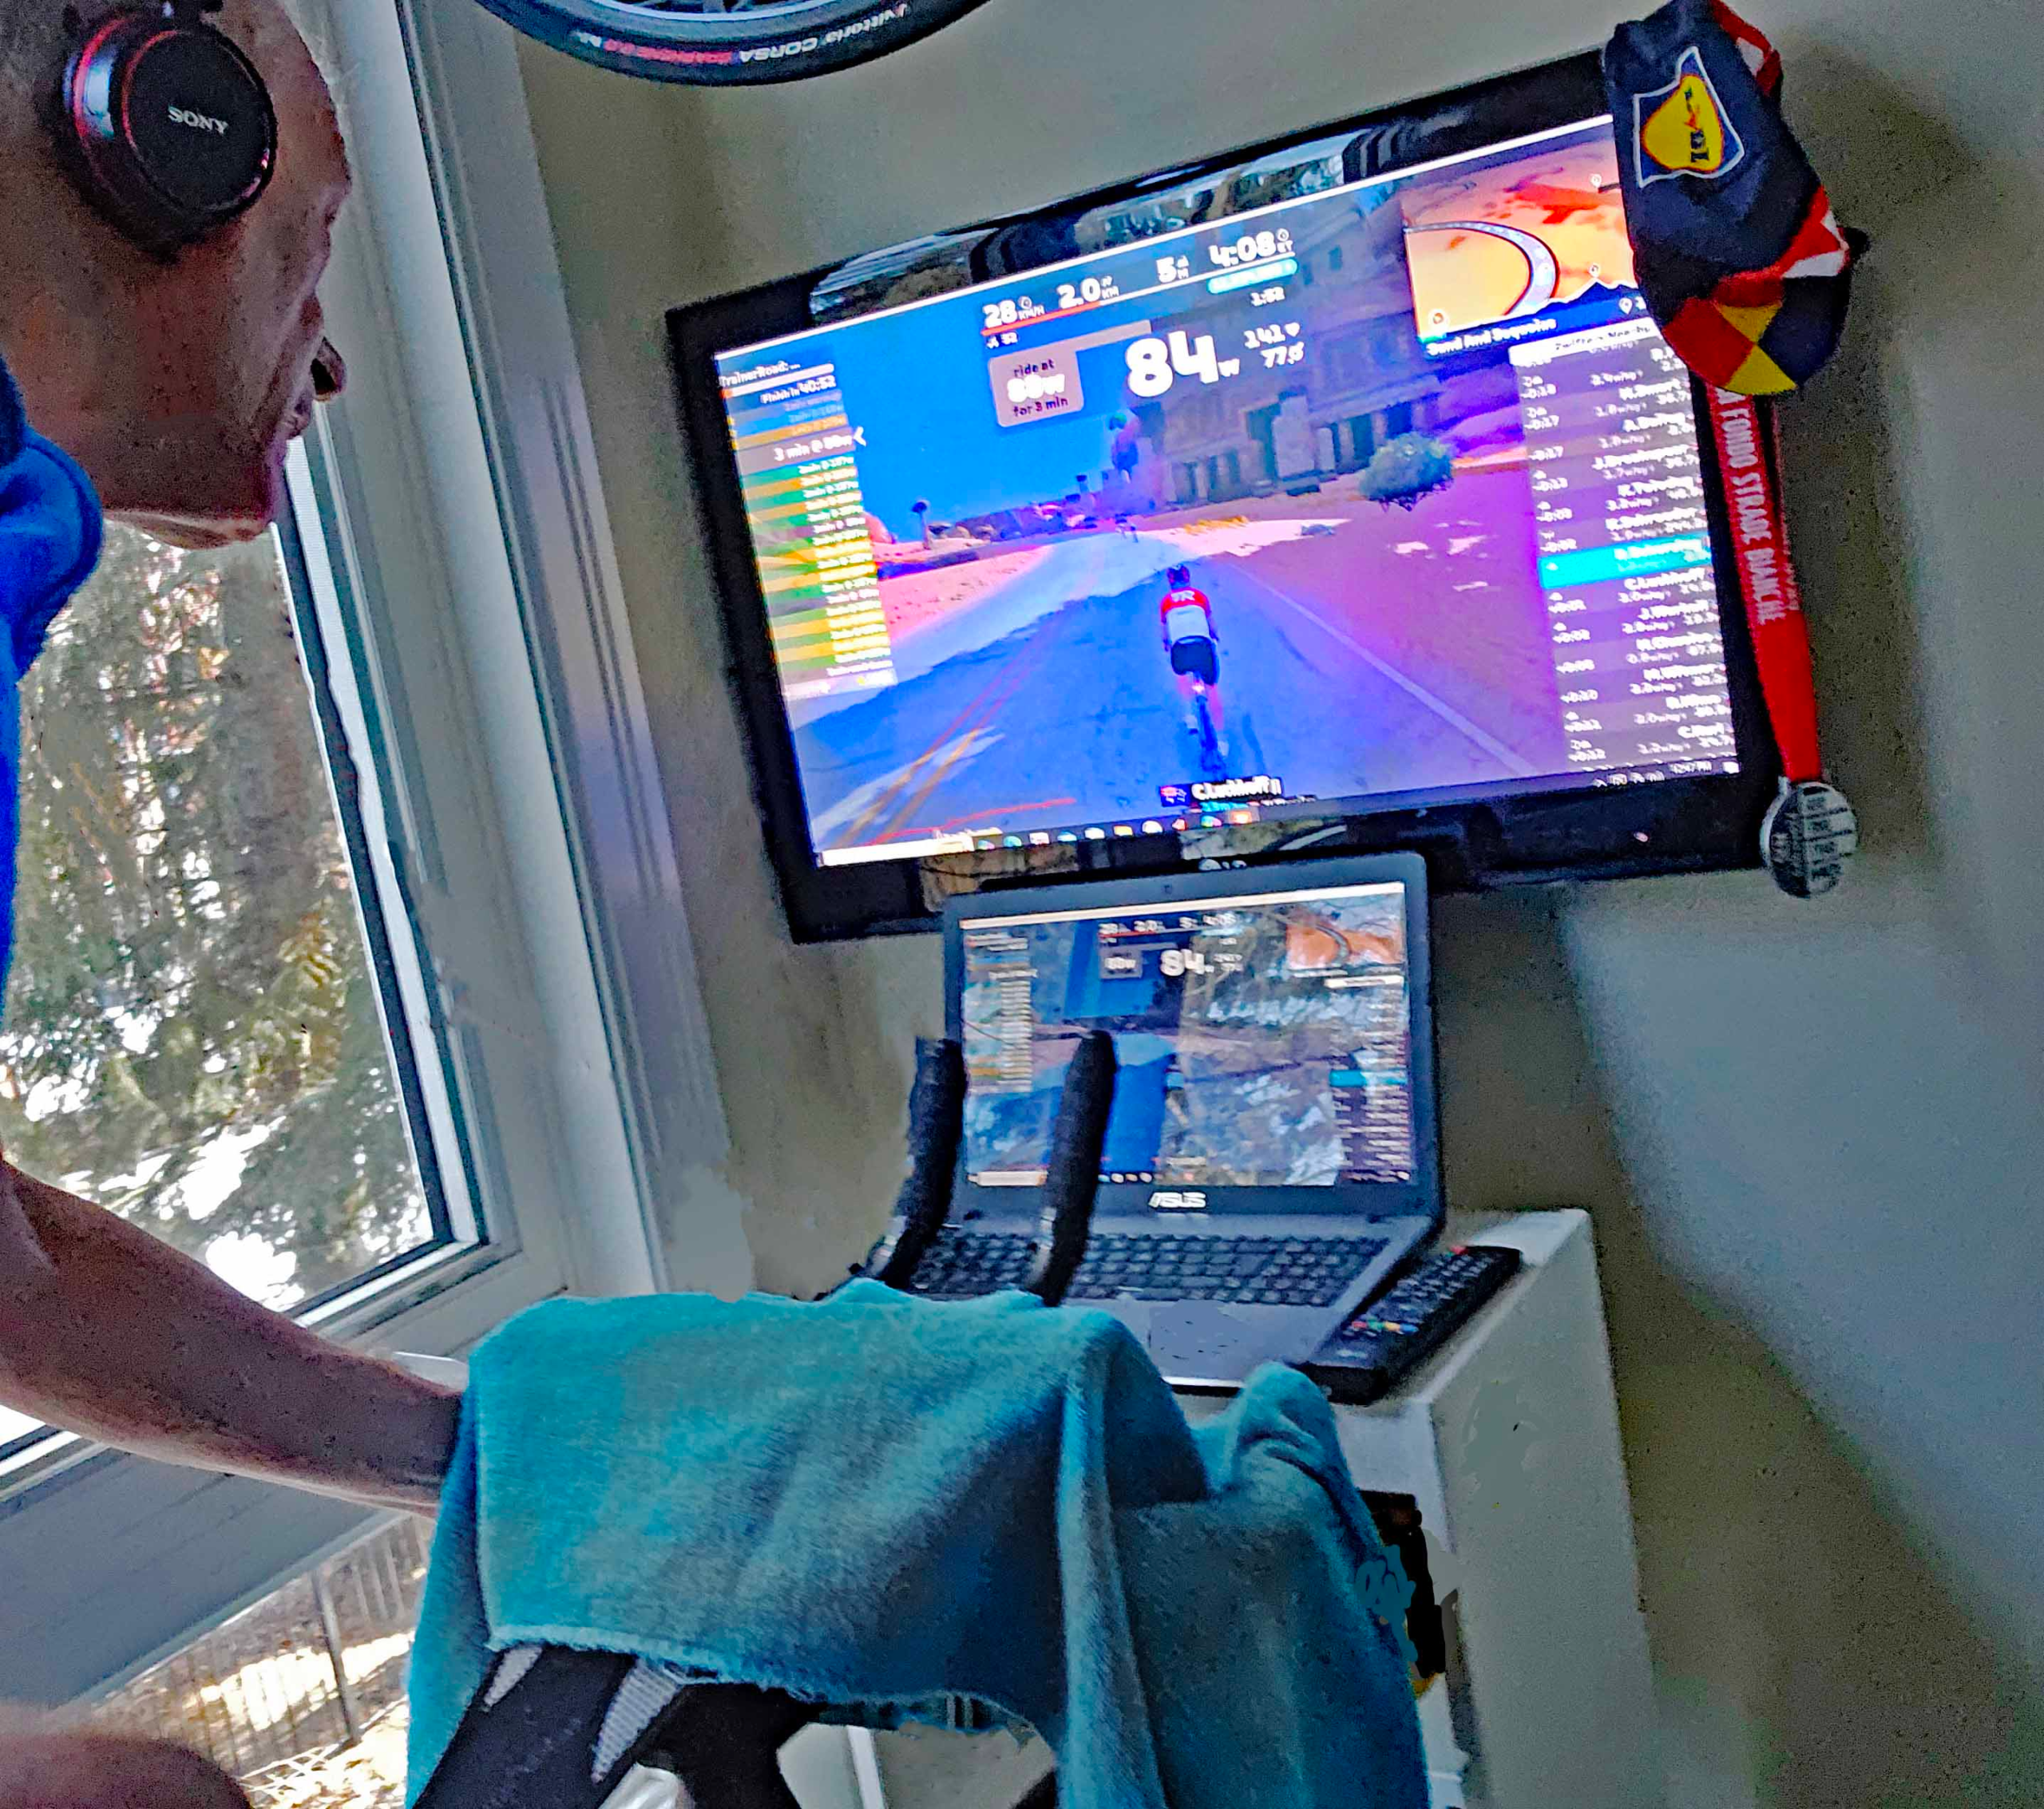
    After 2 ½ hours of riding I had pushed my endurance on that bike to a comfortable limit as my knees and my sit bones ached from the unfamiliar positions.    My heart rate data indicated some 154 TSS of training effort  which was about the same as  for riding a gravel bike with studded tires around Calgary in winter. All in all, it was well worth taking the risk of exploring my surroundings in Belize on an ill-fitting bike but I would advise anyone contemplating taking a hotel bike to increase their cycling range gradually before embarking on an epic excursion. 

    Even so, never underestimate the possibilities with a humble hotel bike!

  • Riding Gravel in Winter?

    Riding Gravel in Winter?

    I have ridden this circuit on two occasions, once in November before the snow arrived and once in January during a sustained mild period that had cleared much of the snow that fell in November and December.  Part of the route, I have also ridden in early summer.  In the summer and November, I rode a lightweight gravel bike with 45mm tires, a top-tube bag and two bidons while on the January ride I took my winter gravel bike that is heavier with its aluminum frame and 40mm studded tires. I may try to squeeze 45mm tires on this when the current ones wear out.

    The 87km route I planned encompassed 37km of prairie gravel road that I hoped would run well if the snow had been ploughed and the residual snow had melted sufficiently. I expected the surface to drain better than on asphalt roads. Apparently, Rocky View County does plough these gravel roads if the snow is more than 10cm deep so I  was optimistic.  

    During the November ride the temperature had been just 5⁰C with a light wind of 10kph from the northwest. For the January excursion, the temperature was predicted to exceed 15⁰C, tropical for winter in Alberta, though the westerly wind was expected to pick up during the day to 20+kph on the return journey.  

    From downtown, the quickest way to south Chestermere threads south east via Inglewood and then alongside the Western Headworks Canal to 50 Ave SE.  Virtually all of the cycle paths and roads were snow- and ice-free even in January thanks to the snow-clearing contractor. Hard ice remained in a couple of spots like the underpass entrance at Highway 2. Additionally, there were sheets of melt-freeze ice across the path downtown. Even with the high daytime temperatures, we had  still experienced an overnight ground frost.  

    On 50 Ave SE, in the places where there was no sidewalk, I would usually ride the informal track cut by other cyclists along the grass on the north side of the road.  In January, the rough track was a ribbon of hard-packed snow and ice even though the snow either side had melted leaving bare ground. Consequently, I reverted back to riding on the paved road. At 52 St SE you turn south over the railway track and then dog-leg east at 61 Ave SE where there is a convenient sidewalk on the north side of the road that  conveys  you over the Stoney Trail highway to 84 St SE.  Turning north, you re-cross the railway and then turn east on Township Road 240 that would be a  continuation of 50 Ave SE  if you had not crossed into Rocky View County territory.

    Worn margins of Township Road 240

    Had this road been in Calgary and not Rocky View County, then  it is likely it would have been paved.  This is possibly the closest stretch of gravel road to Downtown.  

     The gravel was dry and firm, though of slightly different texture to its pre-snow feel.  Road margins were barer and slightly browner in colour but the lateral surface ran faster than the stonier central area.  I found it was easy to maintain 20 to 22 kph, although by then I did have some wind assistance. 

    Continuing eastwards, you cross Rainbow Road that runs up to Chestermere and Township Road 280 is asphalted as far as  Range Road 281, located southeast of Chestermere.  This gravel road runs for 10km due south over two paved east-west roads. Your speed here is greatly affected by the quality of the gravel and the wind speed and direction as the terrain it is very exposed. I had no wind assistance here in January as the wind was light and westerly but I managed to maintained 18 to 20kph because the gravel surface ran well. Even where it was moist from snow melt, the road still ran quickly.   On my “summer” gravel bike, the wider 45 mm tires seemed to float over the surface better giving me 2 to 4 kph more speed.

    Some ice on the margins of Range Road 281

    Where the road rose in gentle inclines, there was hardpacked snow on the surface but mostly only on the north-facing slopes.  With the Rockies clearly visible some 80km out to the west, this section of gravel road is a delight to ride in those conditions, just as it had been in the summer and in Autumn. 

    At the intersection where you turn  eastwards onto Township Road 230, there was  more hardpacked snow. The road here is in the lee of  trees surrounding  the property immediately to the south.  As well as breaking the wind allowing snow to build up, these trees also throw shade onto the road that slows down the thawing process. 

    More ice in the north-facing inclines

    Then, on Township Road 230, the surface was stonier and slower but the wind in winter is often at your back  helping you maintain speed. At the tiny settlement of Indus, the road is paved for the industrial units until you turn north on Range Road 275 where the surface is  rough and slow.

    The bridge over the canal on Township Road 232 is a convenient place to stop and admire the view before turning again northward on Vale Road immediately southwest of Landon.  Finally, you intersect Railway Avenue that parallels the former railway into Langdon which closed some three decades ago.  Only on the very edge of the built-up development will you find the road paved, just before you pass the supermarket and Tim Hortons. 

    I prefer the independent coffee shop called Prairie Grounds on Centre Street.   At lunchtime, you will find students from the nearby high school escaping for a coffee and muffin here, but there is always a comfortable chair for the weary cyclist.

    Prairie Grounds cafe in Langdon

    When you leave, you turn west on Bradner Avenue  and keep going back to Vale Road that defines the current western limit of the town and is paved up to the Glenmore Trail. North of that road you continue on the unpaved Range Road 273. You pass a few rural properties and then at an intersection make the turn west for home back on Township Road 240.  Here, when the west wind blows you feel its full force knocking even more kph off your speed.      

    Icy puddles on the paved path around the Zoo

    You have 5km of Township Road 240 but the last 2km section is paved, as is Range Road 282 that leads you to the south shore of Chestermere Lake.  Building activity in the new development there leaves the roads muddy with deep puddles when the snow melts.  However, the cut through on South Shore Drive connects to Rainbow Road that takes you north on the western side of Chestermere to the main road into Calgary, 17 Avenue.

    The route on 17 Avenue follows a wide shoulder but there are points after Belvedere where you either cycle in the traffic or on the sidewalk.  Eventually, on the section known as International Avenue, you need to cross to the south to follow the bike path on 19 Avenue that is quieter.   19 Avenue leads you to the Boat People memorial above the Bow River and the dedicated bike path drops you under 17 Avenue to follow the Western Headworks Canal, over Highway 2 and around to the Zoo.   There, the paved  path was interspersed with a mix of melted ice and puddles.

    In January, with a headwind on the return, the whole journey took me 5 hours and 5 minutes with a moving time of 4 hours 31 minutes at an average riding speed of 19.3kph. This compares with 4 hours 10 minutes with a moving time of 3 hours 45 minutes and speed of 23.3kph on my lighter Trek Checkpoint in November.  The difference in speed can be accounted for by the lighter, faster bike, dry, ice-free road surface and the lighter winds in November.

    So is the gravel rideable in winter? If you pick a period after a Chinook waming you may prove to be as lucky as I was!

  • Should I buy a new Indoor Trainer?

    Should I buy a new Indoor Trainer?

    From the beginning of my return to serious cycling and structured training a decade ago, I determined I would need two things to improve,  power data and an indoor trainer.  Even though I had been relying on a heart rate monitor during my running years, I had read that there were better ways to measure training effort on a bike.  Also, I learned there were more productive ways of training than merely grinding out kilometres on the road.

    Relative to the cost of a new bike, power meters were expensive. Ten years ago, $2,500 bought you a decent intermediate level carbon road bike with 10 Shimano 105 gears but the cheapest power meters were single-sided crank meters costing a further $700.  Having laid out that expense, I sought an indoor trainer and decided my best option then was a $300 Kurt Kinetic liquid roller wheel that was essentially mechanical but had an upgrade so it that could transmit power data to an app via blue tooth.   

    My current trainer is a “dumb” fluid wheel device that is no longer in production

    My initial indoor training comprised watching Youtube videos of cycling in the Alps whilst trying to follow the power profiles of a free British Cycling training program that I had printed out on paper.  I joined the Zwift platform early on but back then, Zwift didn’t have much in the way of training programs so I moved to using Trainer Road in addition.   At least then I could follow the power trace on a separate computer screen and ride in the Zwift virtual world.  For Zwift and Trainer Road, I was able to use the power data from my left pedal crank. 

    My training power data is from a single sided crank power meter

    Having data from just on crank wasn’t an issue unless there were particular training instructions to concentrate on just my left leg for example  when I would notice big differences in the reported power for the same perceived effort.  At one point, I had enlisted a personal trainer to analyze my riding and give me feedback.  He put me on his Watt Bike that recorded effort from each pedal.  The results showed that, like most people,  I had an imbalance of effort between left and right sides and I always wondered how that would impact my true power output on a bike where only data from the left pedal was recorded?  If my left leg generated less effort, wouldn’t my true power be underestimated by a single side power meter?  How did more modern “smart” trainers differ in this respect?

    The key feature of a smart trainer is that it links in with the terrain and conditions being projected in the virtual world on screen.  If the rider begins to climb a virtual hill in the same gear and cadence (RPM), then their power will need to increase or they will slow down as on a real hill.  On my non-smart trainer if I continued in the same gear and cadence my power would remain the same and my speed would drop on a climb.  I would need to increase cadence or gearing to generate more power to climb at my previous speed.  This is contrary to the real-world situation where you would likely reduce gearing ( go to a bigger sprocket).

    Some high-end trainers can simulate gradients by raising the front forks

    Some current high-end trainers have an additional features  where the bike front forks are raised to simulate the actual incline of a hill,  much in the same way that running treadmills can incline to simulate running up a slope.  Also, there are trainers that simulate the lateral and fore and aft movement of the whole bike. Lateral movement is nothing new as Kurt introduced this feature on a machine more ten years ago but it was a feature that never really caught on.   Similarly, there are fans to simulate windspeed that vary with the video scenario.  The jury is out as to whether these extra features are really worth the expense.  The harsh reality is that you are on a training bike in your basement, not  riding to a mountain pass in the Andes.

    Having researched all that was currently available I needed to sift through the features that would actually make a difference to my training experience.   Unlike most indoor riders, I suspect, I was someone who could stare fixedly at a mechanical power reading and stop watch on a gym fixed cycle and follow a printed interval program. I did find blasting loud music through headphones helped.  Oddly, headphones, much like pedals, are left as an individual choice with indoor training systems even though some systems, like Pelton, have a screen for the video.  For my video screen I have always used the television that was superseded  from my sitting room  and I powered by an old laptop with a gaming chip.     

    Trainer system with a proprietary screen attached

    So, here are the potential features of indoor cycle trainers:

    1. Power at the drive hub displayed.
    2. Power at the drive hub automatically varied by the virtual terrain.
    3. Power balance between the left and right pedals or cranks displayed.
    4. Cadence displayed.  
    5. Lateral movement of bike to simulate sway.
    6. Fore and aft movement of bike to simulate surge.
    7. Raising of front forts to simulate incline.
    8. Variable fan speed to simulate speed of bike.

    For the visual display, there are several options:

    1. Wall mounted television
    2. Stand mounted proprietary computer screen
    3. Stand mounded laptop
    Jagged yellow trace shows how hard it is to follow a power profile manually (non-ERG mode)

    The quality of the perceived ride is dependent on a number of the trainer’s other  specifications:

    1. Weight of flywheel – generally it’s agreed that a heavier flywheel is better to simulate inertia of wheels on a real bike.
    2. Wheel on or wheel off.   Higher end trainers are all wheel off versions where the bike rear wheel is removed and the rider drives a resistance unit.  The resistance unit may have a cassette or a single sprocket like the Zwift hub system that simulates gears.  In cheaper systems, like my Kurt Kinetic, a trainer tire is fitted to a rear wheel and drives a roller by friction.   

    Finally, the quality of the data out will impact the overall cost.  A system that claims power accuracy to within +/- 1% will cost at least twice the price of a machine delivering +/- 2%.  Cheaper machines are likely to be only accurate to 5% which become significant if you aim to train in zones very close to your sustained maximum power output or Functional Threshold Power.

    Even a 1% gradient in the virtual world drives a demand for more power from a smart trainer

    Given this plethora of options, how can I choose what I need and not just go for what I want because it is new and available?    Firstly, I’ll look at power data and control. All machines give power data and, for me, an accuracy of +/- 2% (about 5 Watts at my FTP)  is probably adequate.  While it may be interesting to know what the balance of output between my left and right legs, there’s not much I would be able to do with that information so it’s not something I am going to regularly need. 

    I guess the key question regarding power is whether I want “smart” control with the power demand automatically being changed by the training program, or in the case of programs like Zwift, by the virtual terrain.   People I have spoken to insist it is much easier to follow a training program, particularly in the so-called ERG mode where the program sets the power level the rider has to maintain.  If your cadence slows, power is maintained by forcing you to increase crank torque.  The advantage here is that you are no longer having to chase the power level by pedalling faster  or changing to a higher gear ratio.

    Owners of smart trainers report that you certainly know you have hit a hill in the virtual world when riding in the resistance mode of a smart trainer.  This advantage alone justifies a smart trainer in the eyes of many athletes.  Whether you always stay in ERG mode for intense training intervals is up to you. Some athletes suggest using resistance mode for intervals at VO2 max. Either way, the option is open to you with a smart trainer and, as someone said,  I would rather use the small amount of extra brain oxygen needed to use  dumb trainer in my leg muscles!  

    As for simulating the incline of a hill by lifting the front forks, like many, I am as yet unconvinced.  Unless you are deliberately riding killer gradients, the few degrees of inclination of most hills are barely noticeable  in terms of bike position.  According to Bike Calculator , a cyclist generating 150watts should be able to maintain 28kph on the flat but to travel that fast up a modest 2% (1.12 degrees)  hill the power would almost need to double to 285Watts.  Now, it would be hard to feel a 1 degree slope if you were stationary but you’d quickly notice the extra power needed if you wanted to maintain speed!   

    A fan emulating wind speed also seems an unnecessary extra to me. Cooling fans are important especially in summer of it you are in a windowless basement.  However, if you live in Calgary, you only need to crack a window in winter to get the temperature down.

    Typical sub-$1,000 smart trainer used without rear wheel

    So, do I need a smart trainer? I think the answer is yes because I ride indoors three or four days a week in winter on structured interval rides and group endurance rides.   I don’t think I could justify spending over $1,000 but there are several excellent sub-$1,000 trainers out there.  In Canada we do appear to be paying a premium for these machines though compared with the prices charged to Europeans and Americans.  The most popular mid-level trainer in the UK is currently selling for 450GBP (840CAD) including tax whereas in Canada it is  945CAD with tax.  The US price is around 582USD or 810CAD. Short of going abroad and importing the trainer myself, I am resigned to paying the premium.  

  • Cycling’s love affair with Coffee

    Cycling’s love affair with Coffee

    Many sporting activities have become inextricably linked to a particular beverage. Take for example rugby/beer, skiing/gluwein, ballooning/champagne, polo/gin and tonic. Cycling has long been associated with coffee and this article looks at that relationship and how it developed.

    Coffee as a drink has been around much longer than cycling as a sport.  Even ignoring coffee consumption by central Americans pre-conquest, coffee shops were thriving in the cities of Europe the late 1600’s. Back then though coffee shops were more associated with intellectual activities, like debating and commerce,  than sport.   Cycling as a popular sport and practical means of transport was only really became possible after Harrison’s invention of the Rover Safety Bicycle in 1885. “Safety” here was an inditement of the alternative bicycle, the Penny Farthing where the rider had to balance on a saddle at head height, set as it was over the huge front  wheel.    

    Early Tour de France Racers

    Very early in the development of modern cycling on safety bikes, people realized you could actually travel significant distances,  so very quickly epic endurance races were established, often sponsored by the media of that era, the daily newspaper.  In the 1890s European races like Liège-Bastogne-Liège (250km), Paris-Brest-Paris, (1,200km), were first run and then the first edition of Tour de France appeared in 1903.  That first Tour covered 2428km in just six stages with competitors often riding through the night, unsupported  and fueled by normal foods, and drink including wine and cold coffee.  Coffee warded off drowsiness to some extent and so the relationship between cycling and coffee was set.  

    By the late 20th Century, sports governing bodies were becoming concerned about the sheer amount of caffeine endurance athletes, including cyclists, were consuming and so for a twenty-year period, 1984 -2004, caffeine was a monitored drug with strict limits for Olympians.   Steve Hegg, an American gold medalist track cyclist was famously dropped from the American team for being caught over the caffeine limit in trails for the 1988 Olympics.   Professional cycling was mired by scandals involving far more potent drugs than caffeine over that period  and barely anyone noticed when unrestricted use of caffeine was allowed again in 2004. 

    Caffeine use was severely restricted from 1984-2004 by the ICU and WADA

    In recent years, coffee has been happily reunited with professional cycling. Segafredo, an Italian  coffee company, sponsored the American team Trek until 2023 and the Italian manufacture Rocket Expresso  supplies Bahrain Victorious with high end coffee machines. Continuing the coffee theme after retiring from professional cycling, Christian Meir and wife Amber set up cafe in Girona, Spain,  that is a favourite haunt for the numerous pros who train in the city.  And, slowly, the café and cycling culture that began in France and Italy decades ago, eventually spread reaching Britain, northern Europe and north America by the early 2000’s. 

    Bahrain Victorious and Rocket Expresso in partnership (BettiniPhoto)

    Nowadays, cycling club rides the world over feature a café stop, before, during or after a ride.  Capitalizing on this particular aspect of cycling, retired British pro Matt Stevens has evolved an entertaining series of Youtube videos such as  https://www.youtube.com/watch?v=R30utXEe7mE  where he meets up with a celebrity cyclist and chats about their careers as they ride out to a café and then return home.   The café stop is an integral part of the show as the celebrity will have chosen one of their favourite locations.  

    Chrystie’s Coffee House at Wolf Willow in southern Calgary

    I was thinking about this and wondering where I would lead Matt in our neck of the woods?  As I live Downtown, some of the best coffee stops like Alforno Bakery, Brooklynn’s Café, Angel’s Café and Aggüdo Coffee Roasters  are too close to include in a two- or three-hour ride.   Further out of town I would certainly include Chrystie’s  at Wolf  Willow,  Good Earth in Cochrane and  Prairie Grounds in Langdon.   In winter, these are at the limits of where I would tend to ride but they make fantastic refuges on a cold day! The only downside is having to dress back up to go outside and face the ride home.  

  • When I Should have Stayed Indoors?

    When I Should have Stayed Indoors?

    The weather forecast predicted strong winds, snow accumulations and dropping temperatures in the next couple of hours but I decided to head south down the Bow River Trail anyway.  There was a café in Chapparal that looked like a good destination and I had been turned back once before by pathways covered in black ice. On that occasion I had slid off the bike twice.

    Setting off this time, I found  the cycle path conditions were fine; in places there were patches of ice after a return to cold weather following the weekend thaw, but the tire studs gripped well.  A steady tailwind reminded me that snow was due to arrive from the north but also helped speed me on my way to Fish Creek Park where I stopped off at the wonderful heated restrooms in anticipation of completing the remaining eight kilometres to my destination.

    Clear conditions at Diamond Cove on outbound leg of journey

    However, in the space of ten minutes the wind picked up and swirling snow was being driven downriver, rapidly obscuring the bike trail.  Expecting conditions to worsen, I made the decision then  to turn back. Just how long could 18km taken me to get home? 

    Within a few more minutes the conditions deteriorated further and at Carburn Park, I was having difficulty seeing through my sunglasses as they were both icing up and steaming up simultaneously. I tried without glasses but biting cold ice crystals stung my eyes;  these were not big fluffy snowflakes.   I had ski googles though these fared no better as I discovered the tiny ice particles were being driven through the ventilation slots  so snow was accumulated on the back of my lenses. 

    No time to linger at the brazier in Carburn Park

    My clothing was good down to -20⁰C but I hadn’t realized the temperature was plunging to minus 14⁰C and the wind picking up to 50kph, far worse than the forecast had predicted.   I lingered under every highway bridge and attempted to clear my goggles but my hands froze each time I removed my gloves. Luckily, the small battery powered hand warmers restored my circulation enough for me to be able to grip my handle bars but within a few minutes my vison was gone again.  At times I couldn’t see the path at all and just aimed for the gap between the cottonwood trees. 

    As the snow built up on the path, I had more and more difficulty making progress.  Drifts up to 30cm deep pulled me to a standstill while loose snow on ice caused me to slide.  The wind tugged forcefully at my wheels whenever there was a cross component.  As I approached the Inglewood Bird Sanctury, I was effectively staring at a white screen and riding by the feel of the snow under my wheels. All the while my face and head were starting to become numb even though I was wearing a ski helmet and face scarf.

    Cars in the parking lot suggested the Sanctuary was open but the approach was covered in ice and blowing snow so I had to push my bike across the yard to the entrance.  Abandoning the bike by the doorway, I pushed my way in to the brightly lit lobby where one of the staff gasped in surprise as I shook ice and snow off my clothing and moved to a bench to warm up. While snow swirled around the porch behind me,  I sipped slowly on hot berry drink from the Yeti mug that I had retrieved from my bottle cage and contemplated my next move.    

    Feeling began to return to my fingers and my headscarf unstiffened from its frozen state  but then became damp and soggy instead.  My eyes ached from staring at whiteness  and from the stinging ice, and my neck and shoulders ached from being tensed up in anticipation of  another fall.  Should I call for a ride home or wait out the storm. I had no idea how it would develop.

    Eventually, visibility was good enough to see the fifty metres across the parking lot once again and I thought the wind had lessened slightly so decided to press on home. Most of the route from there was more sheltered either by the trees in Pearce Park or the high-rise buildings of downtown.  Even so, I still couldn’t ride without eye protection so my vision was blurred once again and the drifts were deeper. Apart from one or two dogwalkers, no one else was outside and no-one was attempting to clear the trails.  

    An electric-powered fat-bike overtook me as I approached Eau Claire Plaza and, I mused, it was certainly better suited to the conditions.  I wondered how the other bike commuters I had seen earlier in the day would fare now they had to return home in these conditions?  I’m sure I would be calling for a lift I faced a return ride that afternoon.   My return journey of 16km had taken me over one hour and forty minutes and, even then, my bike computer went dormant two kilometres from home when the battery became too cold. 

    I think I learned my lesson not to distrust the weather forecast as conditions became even worse than the prediction that I had played down.  In future, if I see that If storm force winds are predicted with heavy snowfall and rapidly sinking temperatures, then I will assume the outcome will certainly a blizzard and remain indoors!

  • Cycling in Winter

    Cycling in Winter

    However early the first snow arrives in Calgary, it’s usually here to stay by late November,  though you can never be sure  what the Chinook winds may do.  The majority of recreational cyclists stop riding for the season once the temperature drops below 5⁰C, even before that snow arrives. I can confirm this by observing  the pattern of use in the bike room of my apartment building.  Of the fifty or so cycles stored there, only two or three won’t be gathering dust for the next 6 months.

    A hard core of commuters cycle into Downtown year-round

    Despite the dearth of causal riders, a hard core of commuters continues to ride into downtown year-round.  The bikes they use range from fat tire electric bikes to skinny tired road bikes but you frequently hear the clicking of studs on paving so some obviously change their tires for winter.     Even on the bitterest mornings or when snow is flying, I see riders passing my apartment window.  As the casual riders have long since stopped riding, these commuters must have chosen to cycle for reasons of convenience, economy or health.   

    Riding the trails outside commuting times, you tend to see few other people riding unless the sun is out, the temperature above freezing and the trails are clear.  Although I try to get out in all conditions, the duration of my rides is certainly reduced by low temperatures; two or possibly three hours is enough unless I stop midway for a coffee break and warm up.   Consequently, I  have a selection of cozy cafés earmarked in strategic positions on the edge of the city or surrounding communities like, Chestermere, Langdon, Cochrane and Airdrie.

    Many cyclists don ski helmets and goggle to counter extremely cold temperatures

    Even when I think I am dressed appropriately, sometimes a biting cold wind will surprise and chill me.  In the past, cold hands and feet limited my rides but I have overcome this problem by investing in insulated cycling boots  and handlebar “pogies”.  Pogies are insulated coverings that fit over the brakes and gear shifters  to shield your gloved hands. I wear fully-finger mountain bike gloves for temperatures between zero and 10⁰C  but winter gloves when the temperature is below zero.     Just for good measure, I drop a rechargeable handwarmer in each pogie when the temperature nudges minus 10⁰C.  

    Many riders keep their heads warm by wearing a ski helmet and goggles as the temperatures   plunge.  The extra bulk and weight of a ski helmet won’t make much different to your speed by then as you will also be wearing a heavier jacket, pants, gloves and boots.  You could used heated socks in lighter boots and this combination suits those who want to continue with cleated boots.  However, there are specialist winter cycling boots, from companies like 45 North, that resemble snowboard boots but which are fitted with mountain bike cleats too.  

    Special purpose insulated winter boots with cleats

    Layering is best for leg warmth as your legs are generating most of your muscle warmth while riding and if you opt for heavy ski pants  you can end up sweating, particularly when the sun is out.  I wear thin cycling tights over my bib shorts for temperatures between freezing and 10⁰C  and thicker overpants when the temperatures drop further. Below -10⁰C, I add a polypropylene or smart wool layer under my outer cycling pants.   I have cycled in temperatures in the -20⁰Cs and lower and wore skipants with underlayers on those occasions. 

    Surprisingly, I find my torso can get overly warm if I layer up with a down-type quilted coat before the temperature is in low negative  territory.   It is usually my shoulders and upper arms that feel the cold first so the popularity of sleeveless gillets has always puzzled me. If it is cold enough to need a quilted gillet,  then I need some form of arm protection too.  Again, I tend to layer up, initially with a long-sleeved vest under a long-sleeved cycling jacket and as temperatures drop, I will add a mid-layer, usually a mountain bike jacket.   Only when the temperature sinks below -10⁰C will I consider a quilted layer under my cycling jacket.

    For face protection, I rely on a winter “Buff” to cover my chin, nose for temperatures down to -15⁰C but I wear a balaclava for full face cover when its colder.  I also wear ski goggles over my glasses which is fine until I have to stop at crossings and traffic lights where they start to fog up.  In these sorts of temperatures, you  also begin to get problems with your bike.  Brake and gear cables can freeze if there is a trace of moisture in the Bowden cables,  or battery shifters rapidly lose their charge.  And, of course, there is the issue with to much or too little tire friction.

    Layering for legs is good because temperatures can rise significantly under Chinook winds

    Very cold snow, below -20⁰C is extremely grippy with the texture of fine sand so a thin layer of this adhering to pavement causes no issues, even to unstudded tires. New studded tires will grip well on bare ice but it is the combinations of snow and ice types that we see in Calgary that are problematic.    Particular care needs to be taken on roads and  when crossing sidewalks.

    Sometimes its much safer just to get off and walk

    In near freezing conditions, the weight of road and foot traffic will crush newly-fallen snow into an underlayer of hard ice. If left untreated, subsequent colder snow may not adhere but build up to a depth of many centimetres as loose snow. Even when driven on, this new snow may not pack down  but just be displaced on the slippery, base layer.  When a cyclist attempts to ride through this covering, even with studded tires, the loose snow resists movement turning and lifting the front wheel off the hard layer rendering the studs ineffective.  The loose snow, now under the tire, slides rapidly sideways on the ice taking the front tire with it and a fall is inevitable.    

    Even a studded tire will slide sideways when churned cold snow lies on a layer of hard ice

    The only way to avoid falling is to recognize these conditions and to avoid roads, paths and sidewalks covered in heavily churned dry snow  because the first patch of ice underneath will cause trouble.   Walking and pushing your bicycle here may be your best option to avoid a painful tumble.  But if you have a good sense of balance, don’t let this talk of falling deter you from making use of the winter bike paths  – the City and their contractors  do a great job of allowing us to ride year round if we want to.

    The City does a great job of keeping bike trails clear for us to enjoy
  • Why Ride  Indoors?

    Why Ride Indoors?

    The only reason cyclists used to ride stationary indoors was to continue training during poorer winter weather.  From the earliest days of the bicycle, a three-roller frame trainer was invented where the rear wheel sat between, and drove, two rollers while the front wheel rested on the forward roller.  As the bike was unsupported, the rider had to maintain balance by pedalling smoothly and subtly adjusting their body position.  By the middle of the 20th Century, rollers had evolved little but fixed stand versions were available and there were others where the roller resistance could be adjusted.

    Wooden rollers were used initially for indoor training Photo from Bike Works NYC Bike Racing Machine Intro

    In parallel, the stationary exercise bike began to become popular as a general fitness machine but was not used by serious cyclists as its upright stance and pedalling motion did not emulate that of a racing bike.    Essentially, you had some sort of variable friction drive and a heavy flywheel to smooth out rotation.  For the causal user, who wanted to be entertained, the options were limited to watching television or playing music on the radio or stereo system.  For those users actually interested in cycling there were VHS tapes of cycling events you could play on a (small screen) TV but you were never synchronized to that limited artificial environment.  

    The stationary bikes could record effort expended and virtual distance ridden but you had to write down what the machine had recorded and transfer the data to your paper logbook to make any meaningful training sense of what you had achieved.  At the time, training knowhow was mostly the preserve of coaches and mysterious to most of us.  

    Indoor training began to be taken more seriously, after South African Johnny Goldberg proved a static trainer  could be used in an effective program for endurance cyclists in the mid 1980’s. Ironically, his approach eventually evolved into the modern “Spinning” industry that is more geared towards general- and not cycling-specific fitness. 

    Then, in the 1990’s, coaching programs gradually leaked out in hard copy books by fitness icons like Joe Friel The cyclist’s training bible – Google Search.  You still had to plan out you own schedule and record it manually in a note book or on early personal computers. Only serious riders had the time and interest to add this chore to their riding task.  

    One of the first comprehensive training manuals – published in 1996

    The modern “smart” indoor trainer  has its origins in the early 2000’s when companies in the US and Europe introduced models with electrical resistance  control to follow training programs that were displayed on computer screens. By 2010, systems were launched that could control the bike wirelessly.  However, it was Zwift’s launch in 2014 that gave indoor cyclists the new experience of being able to ride in a virtual world with others where their speed was controlled by the effort they exerted on the stationary trainer.      

    From the early days of Zwift there were races that have now developed into serious “e-racing” events with a world championship. Riders who were successful in the virtual world have even been selected on that basis to join real professional cycling teams.  Also,  some cyclists have found roles as a professional e-bike racer.     

    Zwift UK National Championships 2019

    For those of us not at professional level, the social aspect of using apps like Zwift and Peloton is a big plus.  Countless riders meet up in virtual groups every day for training rides or races.  When my twin brother and I were going to participate in a 10-day ride from Ottawa to Halifax, we would train together for an hour a week on Zwift even though he lives in London UK. That way we could see what level of fitness each of us was at and encourage each other to stick with our programs.   

    Where is indoor cycling destined to go?  For some it has already taken over most of their total riding effort.  They can avoid the risks of riding in traffic or poor weather and still meet with similarly minded riders. As a training tool, it is more efficient and safer than working outside and you don’t have to wash your bike afterwards.   Others, enjoy the social aspect of riding on Zwift, even if they are not following a specific training program.  Overall, I think the level of participation on indoor platforms will tend to reflect the level of interest in outdoor riding on mechanical bikes.   I write “mechanical” because I don’t think the rider who uses an e-bike exclusively is likely to consider riding indoors.  I may be wrong?   

  • How much harder is riding on gravel?

    How much harder is riding on gravel?

    Riding gravel can be tough but once in a while, you attain a speed on a gravel road where your bike mystically rises and glides over the stones. You wish that feeling of floating would continue forever.  But then you turn on to another road, sink down and go back to grinding out the slower pace you were more familiar with.  A scientific explanation is illusive, bound up in “Goldilocks” blend of stone shape and size, tire pressure and speed.    Whatever the cause, once felt the effect is transformative, giving you a greater appreciation of the complexities of riding off pavement and, perhaps, persuading you to return and attempt to recapture that experience on future adventures.  

    Your speed depends on tire pressure, stone size, shape, and whether the binder is wet or dry

    After a long, and usually tiring, ride on gravel I often ask myself: “How much harder was that than riding the same distance on a paved road?”  So, I researched this question to try and find an answer. But I discovered this was not as  straightforward as a simple percentage or distance equivalent.  There are so many variables associated with gravel as it is not a consistent medium, even on the same stretch of road. 

    Rain can turn a fast, hard surface into a sticky morass or, after regrading a previously fast stretch may be left strewn with a new layer of marble-sized pebbles. In time, a gravel surface may crack longitudinally or degenerate into transverse washboard ridges.  In dry conditions, dust from traffic can reduce visibility and treatments  of chloride intended to damp down dust will temporarily produce a cloying mess on tires and drivetrain.  

    Despite the difficulties in giving a definite figure, I will do my best because there is no denying that riding gravel is invariably tougher than riding on paved roads. Here, there is little point comparing the speed of gravel bikes against road bikes on pavement as some people have.  Surprise, surprise, they are slower!  Similarly, only a masochist would consider running a true road bike on gravel so what we need to compare are the right tools for the right job; a lightweight carbon road bike on paved surfaces and a lightweight carbon gravel bike on gravel.

    28mm road bike tires are a bad choice for loose gravel!

    I have a Bianchi Infinito carbon road bike and a Trek Checkpoint carbon gravel bike that I have ridden with the same Garmin RS 100 pedals. These pedals provide single-sensing power so if I go back through old Strava files,  I  should have some data for comparing the performance of a road bike on pavement with a gravel bike on gravel.  Looking at the files, I had to confirm my road cycling was not on as part of a group ride. I often ride with a club group on the road but not on gravel. Any group aerodynamic advantage would tend to make road riding appear even easier.  I also had to try to eliminate any advantage derived from wind or slopes.

    Here’s a couple of rides that are reasonable examples to compare.  The first shows 10km on gravel north east of Calgary while the second is from 6km on paved roads to the northwest. Power averages are comparable, 119W on the road and 116W on gravel and my average heart rates are both 128 beats per minute.  For the paved road the average speed is 27.0kph while on gravel it was 22.3kph,  17.5% slower.      This means you consume 17.5% more energy to cover the same distance as well as taking that much longer.   To achieve the same speed a power calculator like CFM Calculator  Cycling Wattage Calculator  suggests I would  need 159W or 37% more power.   

    Extract from a ride on gravel with Trek Checkpoint gravel bike
    Extract from a ride on pavement ride with a Bianchi Infinito road bike

    My gut feeling is this appears about what I would have expected for solo riding on a flat road with no significant wind influence. However,  the figure seems underestimate the effort needed for a long ride.

    In the real world, there are additional factors from  riding on gravel that need to be added into the calculations.  These include the vibration loading on your arms, shoulders and neck that your musculoskelatal system needs to stabilize.  The additional energy you consume in your upper body is noticeably greater riding on gravel.   

    Also, there is the mental energy you expend chasing the best line down the road.  Sometimes the best line is the hardpacked margin that missed the spread of new road stone though this frequently turns to soft dirt forcing you back to seek out worn tracks nearer the road centre.  On double wide roads there is sometimes a bald trail on the crown of the road that runs fastest but you have to remain alert to traffic from in both directions.  Your brain is constantly processing inputs and choices, again demanding more energy than it would if you were pottering down a on a smooth, paved road.  

    On the plus side though, the mental stress of dealing with motor vehicles can be lower on gravel roads as traffic is sparser and slower than on busy highways.  Even so, the net mental energy loading is probably higher on gravel than on the type of  rural paved road where we generally try to ride.

    When you add together the additional mental energy with the energy required for upper body stability and the energy needed to power over the surface, it’s easy to see why some riders believe a gravel ride is equivalent to a ride of 20% to 50% longer on a paved route. (Is Gravel Riding Harder Than the Road?).   In extreme terrain,   like hilly single-track or sticky mud, that multiple could be much higher.  When I ride the single track on Nose Hill in Calgary, a 20km ride can seem like 40km to 50km on the road.   

    Nose Hill’s single track can be slower and tougher to ride than unpaved prairie roads

    I think the key difference between gravel and road cycling is there is a minimum “power buy-in” on gravel just to get moving.  Sometimes this means that you have to pedal just to maintain forward speed on downhills where on an equivalent grade of asphalt your road bike would continue to accelerate until aero drag balanced the force of gravity.  On flat roads this “power buy-in” flavours more powerful riders, which usually means bigger riders.  However, on hill climbs, being lightweight is still the advantage it is in other cycling disciplines, provided that extra “power buy-in” is not too great a percentage of your long-term power output (or Functional Threshold Power).

    How much harder is riding on gravel?  From my experience, for the type of gravel roads you could drive a car along,  I estimate you will go 20% slower or need 40% more power to maintain the same speed. And if you ride for more than a few kilometres, each kilometre will seem like 1 ⅓ road kilometres by the time you have finished.    Go out there and compare the differences yourself!

  • Are Studded Tires Worth Buying?

    Are Studded Tires Worth Buying?

    Until I moved from BC to Calgary, I didn’t even know studded tires were a thing for bikes. Sure , I had seen them on cars and even some motorbikes when people from the more mountainous parts of the province ventured down to what we called “the Lower Mainland” in winter.  Many people living on the flat lands of the Fraser Valley never bothered to change to winter-specific tires let alone studded tires.  This was always evident during my daily commute when the first snow fell and countless pickup trucks ended up in the central median of the Trans-Canada Highway.

    My local bike shop, here in Calgary gave me the pros and cons of studded tires when I was setting myself up to ride “for pleasure” through a real Canadian winter.  Even though I had lived in Ottawa for four years where there were real winters, I had never contemplated commuting there by bike in winter.   However, here in Calgary, there are so many bike paths, separate from car traffic that are ploughed free of snow so it is easy to enjoy cycling year-round. 

    Enjoy year-round cycling in Calgary

    I initially questioned the need for studded tires with such infrastructure until I experienced the freeze-thaw conditions that came from an unexpected Chinook wind.  The Chinook and bright sunshine melted banks of snow at the edge of the bike path and once the Chinook abated,  the film of water froze to black ice overnight.   

    On normal tires, you can ride over ice unhindered, but only if you remain upright, travel in a straight line and don’t brake.  It isn’t long though before you can’t meet all these conditions  and experience a fishtail or worse. This should be enough to convince you that  studs are a good investment. 

    A typical studded tire – stiffer and heavier than foldable summer tires

    So how do tires with studs actually run?  I use 40mm Schwalbe Marathon Winter Plus that have 240 tungsten carbide studs.  When you swap out flexible summer tires, you first notice how much heavier studded tires are.  They can be somewhat harder to fit on the rims and you may want to wear tough gardening gloves to grip and pull the tire as new studs can be harsh on bare skin. Also, if you wear Gortex overboots or big winter boots, you need to be extra vigilant when turning the front wheel as the rotating studs will readily shred any material they come into contact with.  

    Riding on concrete and asphalt is certainly noisier on studs as there is a definite background hiss.  I’ve never noticed any reduction in control but then I wouldn’t push these tires on hard cornering whatever surface I was riding on.  They really come into their own where you encounter sloping, smooth ice either uphill or across the path.  Here you can confidently traverse treacherous conditions that would be tricky or even dangerous if you tried to walk and push a  bike with conventional tires.

    On pure snow, studs do nothing; tire pressure, tread  and width are all important for maintaining traction there.  Studs are good on frozen dirt trails, like those in Nose Hill Park and where snow has been compressed to a thin hard layer but not on deep snow.  

    Studs work well on hard-packed snow trails like this at Weaselhead

    So how much slower do studded tires roll?  This is a valid question but the answer is not so straightforward in real life conditions because the studs allow you to maintain speed where you may  otherwise have slowed on ordinary tires.  For the same power output that would roll you at 22kph on a  bare cycle path, you would probably lose 1 to 2 kph on studs.   In mixed conditions of snow, ice and bare roads, the speeds of both tire types are probably comparable but the likelihood of a slip is much higher without studs.

    When do you change over to studs and would I change back to stud-less tires in winter for a long ride where I knew the surface was bare?  Firstly, when to start riding on studs.  If you use winter tires on your car, this is pretty much the same question and often the answer for people is immediately after the first snowfall. Often that is too late as the spate of accidents that first day of snow will confirm.  You could leave the changeover to the night before the first expected snowfall or a day or two in advance of that just to avoid being caught out.  Don’t remove them until after the freeze-thaw cycle is over in late April or even early May in Calgary.

    During the day, snow can melt across cycle paths and freeze over at night giving ice

    And, would I revert back to normal tires  if I knew the surface would be bare for a while?   I maintain a gravel bike without studs for most of my summer off road riding though in winter, it normally hangs up in my bike room. As I run tubeless tires on that bike, I would have to consider the state of the sealant that has a limited usable life so, I would probably opt for a road bike with innertubes to save the hassle of sealant or swapping tires just for one ride. If you have just one bike and you are riding with others, then change the tires to match what they are choosing.      If you are riding solo, then its up to you if you don’t mind the slower speed and wear on your studs. 

    Studded tires should last a few seasons of commuting

    Specialist Manufacturers like  45 North suggest studded tires should last 4 seasons of typical commuting which sounds like quite a few kilometres! So, when do you need to replace studded tires?  Road tires have a wear dimple to indicate minimum rubber thickness but what about studded tires?  The simple answer is there is no obvious wear limit; while they continue to provide grip, they  are good to use. Most winter tires have extra thick casings too so this adds to their durability.

    Are special studded tires worth the investment?   Certainly.  If you are choosing to ride in winter, you will have already invested in suitable cold weather clothing for comfort.  Studded tires give you confidence and an added level of safety that normal tires simply cannot emulate.  Anywhere, that experiences winters with long periods of snow, ice or freezing rain are locations where I would recommend trying studded winter tires.  

  • Where do I start riding gravel?

    Where do I start riding gravel?

    A local rider mentioned recently that they had a new gravel bike but had only ridden it on pavement. Where did they start riding on gravel?  The answer is to look outside the city limits. While we have a fantastic network of cycle paths, they are almost exclusively paved which is fantastic unless you want to learn to ride gravel.   Fortunately, Rocky View County, that encloses us on  three sides has 1,600km of gravel roads and these are a great place to begin your gravel adventures.  

    Gravel roads are shown as red lines on this map:  /www.rockyview.ca/Portals/0/Files/Maps/Rocky-View-County-Map.pdf   

    A mesh of gravel roads are found just south east of Chestermere

    You may wonder why I didn’t mention Nose Hill Park that is within the city and has numerous unpaved trails.  For beginners, though the paths on Nose Hill are frequently narrow and often steep so are best tackled when you have gained confidence on more forgiving routes.

    Areas with a high density of linked gravel roads

    The closest areas with a good density of wide gravel roads which can be linked together to form  circular route are:  to the north between the city and Madden;  the north east from Chestermere, and the south east from Chestermere.  There is also a small area in Foothills County east of Okotoks.  Rides of 20km, 40km or even 80km can  readily be planned where virtually all the riding will be off pavement.  The road surfaces will vary from old, hardpacked gravel that runs freely to new loose gravel that fees like cycling on marbles. Occasionally you will encounter that bane of all unpaved roads, washboarding, where the surface pushed into closely-spaced ridges and it feels like you are riding on a corrugated iron roof.   

    there are few places where you can freewheel other than on obvious downhill sections

    While there is some rural traffic on these roads, they are lightly used and drivers are likely locals.  Even so, it still best to ride with a high intensity rear light to be seen when passing vehicles kick up dust.  There are undulations in the prairie terrain that these roads pass through so you need to take care near blind summits  if you are tracking the middle of the road, following the smoother line.  You quickly learn that the easiest line to follow is in the wheel tracks of  previous car and truck  users.   

    The Inverlake Road east of Chestermere is an easy road for beginners

    Once you have cycled a few kilometres on gravel, you will begin notice that there are few places where you can freewheel other than on obvious downhill sections.  The extra rolling resistance  is reflected in your speed that is likely  5kph slower than your road bike speed, so don’t be too ambitious with target distances.  If you are used to riding 40km on the road,  I would initially reduce that distance to 20km on gravel.

    A dirt road near Madden – sometimes unpaved doesn’t mean gravel!

    With some experience on gravel, you may be ready for the more challenging routes in the foothills such as in the Ghost Public Land Use Zone north of Cochrane, the MacLean Creek Off-Highway PLUZ south of Bragg Creek or even further south in the Porcupine Hills  west of Nanton and Claresholm.  Some ideas are given on these sites Alberta Gravel Cycling Routes and Gravel Cycling Routes Calgary Alberta Canada — BikeBike  but be aware that the riding in these areas is often much tougher than on the prairies and these areas are more remote if you get into difficulty.

    Trail conditions vary enormously in wilder areas like Gorge Creek west of Millarville
    More challenging roads in the Ghost PLUZ

    Wherever you start to ride on gravel, one thing is certain. You will soon be out looking for more routes in more interesting areas. You may be seeking the solitude of the forests or the challenge of steeper climbs, or may just enjoy cycling on roads with little vehicular traffic. Whatever your reason for riding off pavement, there’s no reason why you can’t enjoy both paved and unpaved experiences. Gravel bikes ride very well on pavement too!